Installation
RuntCMS installs in minutes. Upload the files, visit the installer, fill in a few fields, and you're done.
Server requirements
| Requirement | Minimum | Recommended |
|---|---|---|
| PHP | 8.2 | 8.3 |
| Database | MySQL 8.0 / MariaDB 10.6 | MySQL 8.4 |
| Web server | Apache with mod_rewrite | Apache with mod_rewrite |
| PHP extensions | pdo, pdo_mysql, mbstring, json, openssl | |
.htaccess overrides are allowed.
Database user privileges
The database user you provide during installation needs these privileges on the RuntCMS database:
- SELECT, INSERT, UPDATE, DELETE
- CREATE, INDEX, ALTER (needed during installation to create tables)
After installation you can remove CREATE, INDEX, and ALTER if your host allows it — day-to-day operation only needs the first four.
Uploading files
- Download the latest RuntCMS release archive (
runtcms-0.9.zip). - Extract it locally.
- Upload all the contents to your
public_htmldirectory (or whichever directory your domain points to) via FTP or SFTP.
The directory layout after uploading should look like this:
public_html/
  index.php
  install.php
  .htaccess
  cms/
    pages/
    css/
    js/
    uploads/
  app/
vendor/vendor/ directory as-is — it contains the PHP dependencies and is included in the release archive. You do not need Composer on the server.
Running the installer
Once files are uploaded, visit https://yourdomain.com/install.php in your browser.
The installer walks you through three steps:
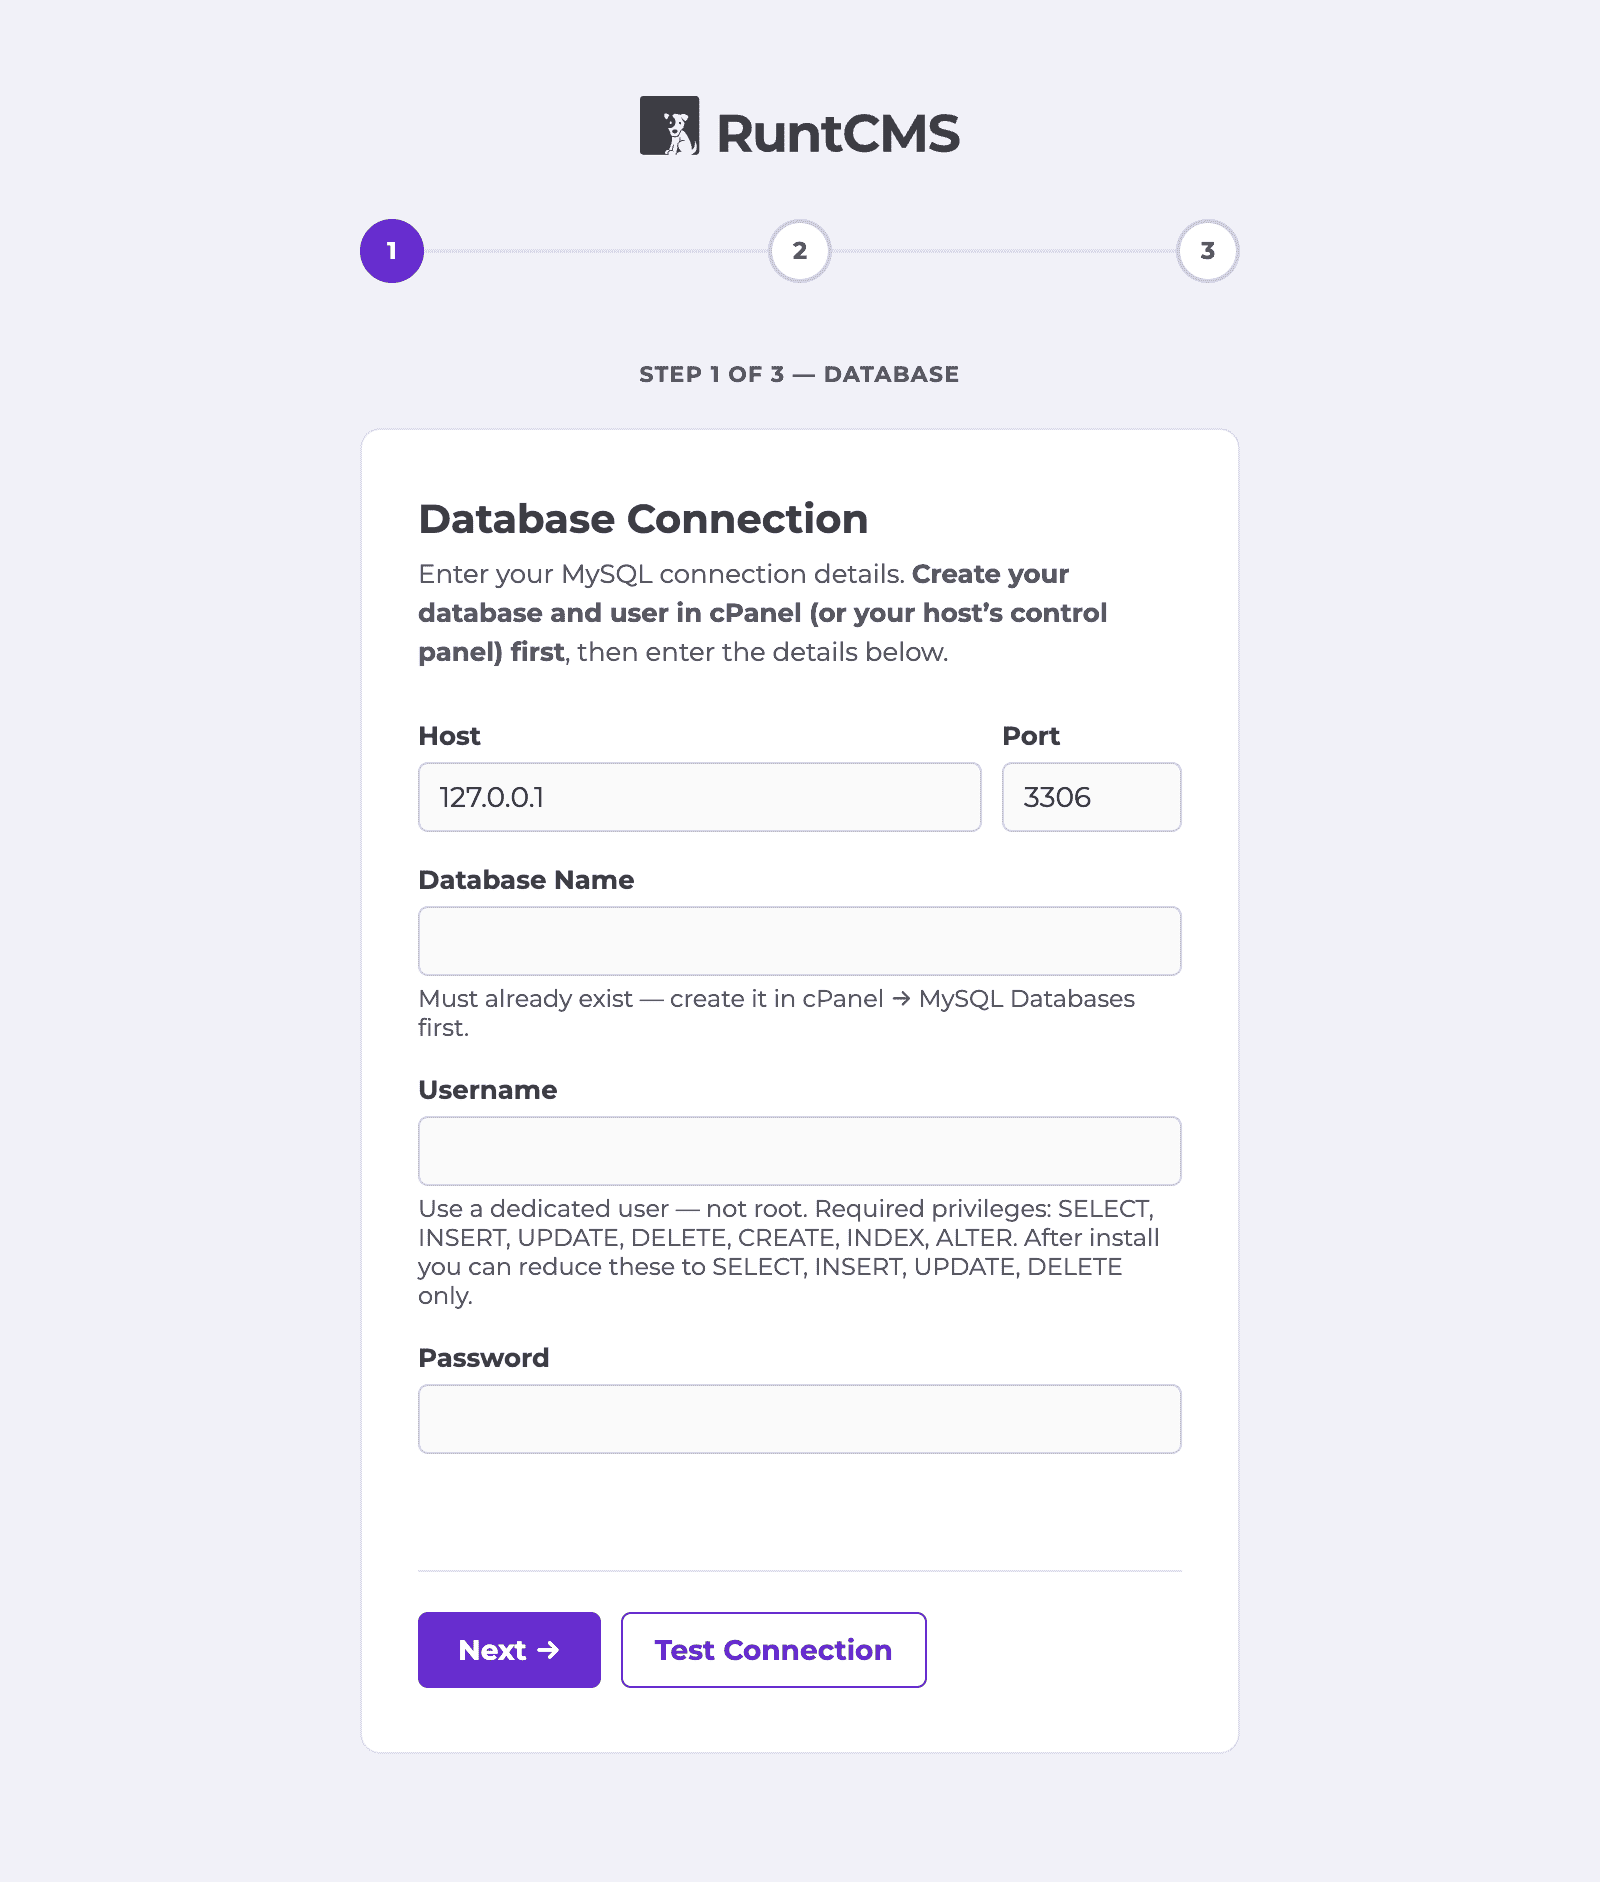
Step 1 — Database
Enter your database connection details:
- Database host — usually
localhost - Database name — the database you created for RuntCMS
- Database username
- Database password
The installer tests the connection before proceeding. If it fails, double-check the credentials in your hosting control panel.
Step 2 — Site details
- Site name — shown in the admin panel and outgoing emails
- Site URL — the full URL including
https://, no trailing slash
Step 3 — Admin account
- Your name
- Email address — used to log in
- Password — minimum 12 characters recommended
Click Install RuntCMS. The installer creates the database tables, writes config.php, and creates an install.lock file.
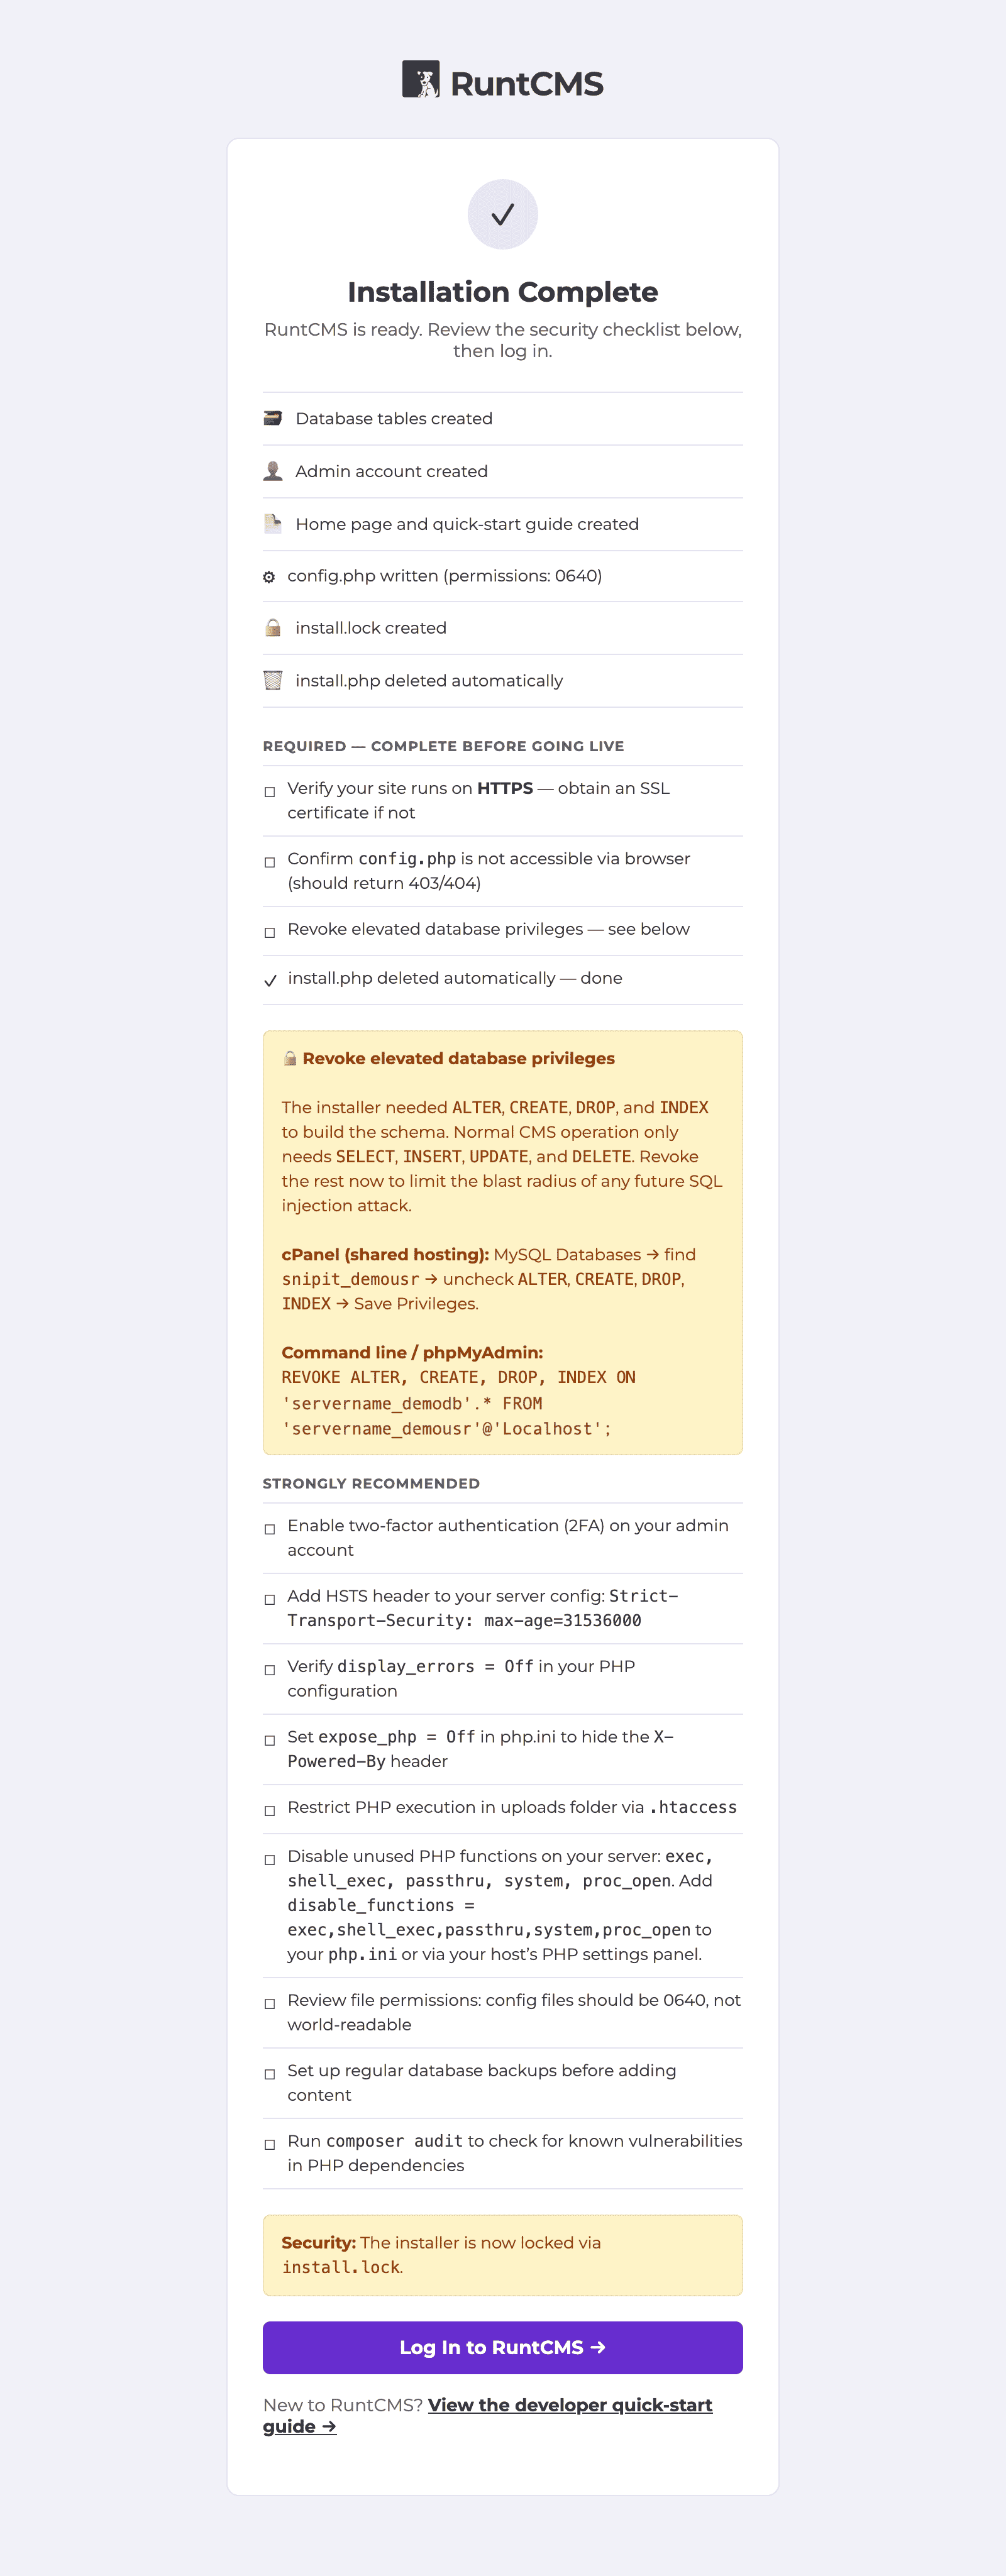
After installation
Once the installer completes, a confirmation screen appears with:
- A checklist of what was created (database tables, admin account, config.php, install.lock)
- Whether
install.phpwas deleted automatically — if not, a red warning shows the exact path so you can delete it manually via FTP or your hosting file manager - A security checklist of steps to complete before going live (HTTPS, display_errors, 2FA)
- The exact
REVOKESQL command to strip elevated database privileges — see Hardening database privileges below
Click Log In to RuntCMS to go to the login page.
install.php is deleted. Until it is, a red banner will appear on every admin page as a reminder. If anyone could visit that file, they could reset your database.
Hardening database privileges
After installation, the database tables have been created and the install user no longer needs CREATE, ALTER, INDEX, or DROP privileges. The success screen shows the exact REVOKE SQL command to run — something like:
REVOKE CREATE, ALTER, INDEX, DROP ON your_database.* FROM 'your_user'@'localhost';On cPanel hosts, you can reduce privileges in MySQL Databases → Current Users → Edit Privileges — uncheck everything except SELECT, INSERT, UPDATE, DELETE.
This is optional but recommended. Day-to-day RuntCMS operation only needs SELECT, INSERT, UPDATE, and DELETE.
Troubleshooting
500 error after upload
Usually a .htaccess issue. Make sure:
mod_rewriteis enabled on the server- The directory has
AllowOverride All(notAllowOverride None) in the Apache config
Blank white page
Enable PHP error display temporarily by adding this to the top of index.php:
<?php
ini_set('display_errors', 1);
error_reporting(E_ALL);
The error message will tell you what's wrong. Common causes: missing PHP extension, wrong file permissions.
Database connection failed
- Verify the database exists in your hosting panel
- Check that the user is assigned to the database with the correct privileges
- On some shared hosts the database host is not
localhost— check your hosting documentation
File permissions
The web server needs write access to cms/uploads/ and cms/pages/. Set these directories to 755 or 775 depending on your server setup.